Oatmeal: my favourite breakfast in 4 variations

Ok, this is a little silly. A really long post about oatmeal and recipes on how to make it. But this isn´t so much about following the recipes, more as an inspiration, or a reminder of good oatmeal is for you, how versatile and easy it is to make, and not at least how tasty it can be!

img_1703

I remember being asked what my favourite breakfast was once. If I were to choose whatever I could have, what would it be. And I immediately replied oatmeal – to the person asking´s great surprise. He was like OATMEAL???? “Seriously? Did you understand the question?”

Sure I did! Like many guys, he didn´t share my enthusiasm for oatmeal, because he, like many other, had bad experiences with oatmeal growing up. And he didn´t know how to prepare it either, either turning it into a dry mass, or too watery, almost soupy-like.

So of course, this guy probably wouldn´t prepare it anyway, since his idea of oatmeal was equal to a nastylooking and tasteless thing. Not that it´s rocket science to prepare a bowl of oatmeal, but it almost seems like it, when you can accomplish so much with so little effort! From dull to delish in an instant! You better try. You owe it to yourself to try a decent bowl of oatmeal for breakfast every now and then. And who knows, maybe you´ll be an oatmeal-convert too? I recently convinced my mum, who had a strong resistance against oatmeal due to childhood overdose.

I particularly like oatmeal for breakfast this time of year, when it´s cold outside.  It´s such a comforting breakfast for cold days, warming you up so you´re prepared to leave the house!

I make my oatmeal in many different ways. Or actually, come to think about it, I don´t.  But what I add to the oatmeal depends on what I have or what I´m in the mood for. And the key ingredient, which isn´t an ingredient at all, but a method, is to soak the oats overnight. I find that really makes the oatmeal a lot better. Soaking also make the oats more digestible and help your body to absorb the minerals from the oats. And, it reduces the cooking time – which is always a plus in the morning!

My toppings usually consist of some kind of fruit, some kind of nuts and something creamy: Fruity+Crunchy+Creamy. I always have roasted almonds around, because I simply cannot live without. Fruit/Berries can be whatever´s in season, or whatever you prefer, and nut butter, youghurt, applesauce  can be the creamy component. But these are just suggestions, and my personal preferences,  but of course any toppings and combinations can do!

Classic oatmeal for 1

I guess you don´t really need a recipe for oatmeal, but here´s a single serving of oatmeal ingredients without any add-ins or toppings:

  • 1 dl oatmeal
  • 2 dl milk
  • salt

Almondy oatmeal with persimmon (and chocolate chunks)

This is my favorite at the moment. I love persimmon, and now that the season is here, I want as much of it as possible. So I included it in my bowl of breakfast oatmeal, with great success!

img_1708

Toppings: 1/2 small persimmon chopped,  a spoon of almond butter, roasted almonds and/or dark chocolate

Add the oats and milk to a saucepan and allow it to heat for about ten minutes, until the liquid has all been absorbed. Stir in almond butter, and serve with chopped persimmon,  almonds (and/or chocolate)

Coconut-Banana oatmeal with blueberries 

  •  2 dl / 1 cup of water
  •  30 g / 1/3  cup of oats
  • 4 tablespoons of coconut milk
  • 1 tablespoon of almond butter
  • 1 banana

Toppings: fresh blueberries, crushed nuts, raisins and cacao nibs or chocolate

skjermbilde-2016-11-01-kl-11-32-42

Simply add the oats, water, coconut milk and slices of banana to a saucepan and allow it to heat for about ten minutes, until the liquid has all been absorbed. Then stir in the almond butter and coconut oil and let them dissolve into mix. Once it’s all nicely mixed pour it into a bowl, add all your favourite toppings and then it’s ready to enjoy!-berry oatmeal

Banana-berry oatmeal:

Toppings: 1/2 a banana, a handful fresh or frozen red berries of choice and a good scoop of peanut butter

Add the oats, water, milk to a saucepan and allow it to heat for about ten minutes, until the liquid has all been absorbed. Serve with chopped apple and roasted almonds, and a good dollop of dulce de leche with a sprinkle of sea salt on top, giving it a lovely luxury touch.

banan-bringebaer

Oatmeal with apple sauce, natural/greek yoghurt and nuts 

This has become another favorite lately, after I made my own very delicious applesauce of the tasty Norwegian apples in season right now. Of course bought applesauce is good too, but if you have access to good flavourful apples, it´s really worth it and easy to make your own.

Add the oats, water, milk to a saucepan and allow it to heat for about ten minutes, until the liquid has all been absorbed. Serve with a tablespoon of applesauce, youghurt and a handful of your favourite nuts or a muesli.

img_1716

Caramelly oatmeal with apple and nuts

Toppings: 1/2 apple diced, 1 spoon dulce de leche and a handfuld of chopped  roasted almonds

Add the oats, water, milk to a saucepan and allow it to heat for about ten minutes, until the liquid has all been absorbed. Serve with chopped apple and roasted almonds, and a good dollop of dulce de leche. I can´t really take credit for this one, but thanks to GRØD who put oatmeal in fashion and popular, this has become one of my (and their) all time favorites.

eplekaramell-closup

Nectarine Pie


IMG_1132.jpg

Usually I get excited for autumn which is my favourite season above all. When it gets here I’m all about scarves, candles and apples and cool weather. I just wish it would wait a little bit longer. As much as I love autumn, I’m not quite ready for summer to be over. Particularly since I don´t feel it´s been a summer at all this year with low temperatures and lots, lots of rain. But luckily the last weeks we´ve had several days of sun and heat, and I was reminded that I’m not ready to move forward into autumn yet. I want more summer!

The good things about autumn though, is the abundance of (Norwegian) plums and apples which are my favorite fruits. On the downside, it´s the end of nectarine season, which is another favorite of mine. So the last days I`ve been buying a lot of nectarines, just in case it would be my last chance.

They are no longer at their peak, but still delicious, and this weekend I decided to put some of them into a pie. Before they are gone. Luckily plums will be there to fill their gap. For a while, at least. The season is way too short for stone fruits…

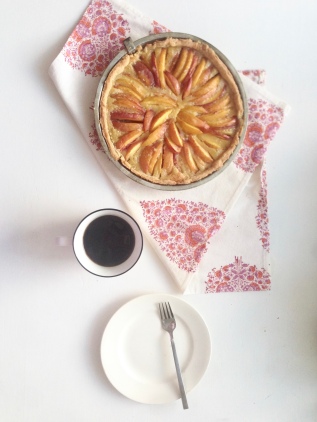
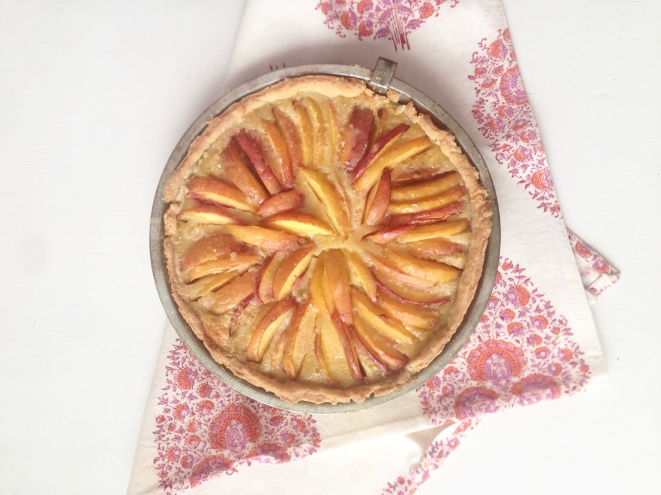
This nectarine pie might be my last chance to celebrate stone fruit for awhile. Be sure to make it before the nectarines have vanished for the year! Each bite of this sweet, decadent pie tastes like summer. Even if summer never was here, this pie makes it feel like it.

img_1136img_1144

Nectarine Pie

Prep time
1 hour 30 mins
Cook time
1 hour
Total time
2 hours 30 mins
Pie crust:
150 g all purpose flour
115 g cold butter
3 tbsp cold water
1/2 tsp salt

In a large bowl, combine flour and salt. Cut in butter until mixture resembles coarse crumbs. Stir in water, a tablespoon at a time, until mixture forms a ball. Wrap in plastic and refrigerate for at least 30 minutes.
Roll dough out to fit a 9 inch/22 cm pie plate. Place crust in pie plate. Press the dough evenly into the bottom and sides of the pie plate.

Filling:
4 nectarines
100 g marcipan
1 egg
50 g sugar
1 tpsp cornstarch
pinch of salt

Slice the fruit in half and remove the pits. Place the nectarines flat side down and cut into thin slices. Place the sliced nectarines in a large bowl and toss with cornstarch and half of the sugar.
In a small bowl, stir together egg, grated marcipan the rest of the sugar and salt.

Pour the filling into the pie crust.
Arrange the sliced nectarines on top of the filling in any way you like. Or don´t arrange them at all, and just toss them over. Still pretty, and equally tasty – but less fuss.
For once I took the time to make a litte effort arrenging the fruits.

Sprinkle with sugar and bake on 180 C for 40-50 minutes, or until the crust is golden and the filling is bubbly. Allow to cool completely to room temperature before slicing (the filling will thicken as it cools).

Enjoy with a dollop of creme fraiche and savour the sweet, juicy taste of summer!

Notes:
The pie was very sweet, so I think one easily reduce the amount sugar, or even omit it. The nectarines are sweet on their own, and even more so after they´re baked, and the marcipan also adds sweetness. But don´t leave out the marzipan, as it makes the filling sweet, but also buttery and creamy. So that will be at your own risk.

IMG_1127.jpg

Danish”Hindbærsnitter” – frosted raspberry pop tarts!

IMG_0532.JPG

I have tasted Hindbærsnitter twice in my life. Today, making these, and a year ago, when I made my first batch ever of Hindbærsnitter. This was embarrassingly enough also my first taste of hindbærsnitter after 5 years in Denmark, where these sweet pop-tart-looking things appear and are sold in every bakery  you go by. And lord knows I´ve been around those Danish bakeries quite often, so I´ve had several opportunities to try them out. Buuut there were always some Cinnamon-rolls or other tempting goods that got in the way, so I never really got around to it. But last summer I made a lot of raspberry marmalade, and I needed to put it to use, so I thought of the so-called Hindbærsnitter and decided to give it a go. And it was good, I tell ya… And I couldn´t help but thinking: What took me so long? Why haven’t I tasted them before?

(Well I´m not sure if this really counts: I mean, I´ve only tasted my own , never a true Danish hindbærsnitte, so for all I know, my version might be waaaay off. But I don´t think so, though. I´ve done my recipe research, so I think a Dane would approve…)

And fast forward to today, I´m where I was a year ago. I needed an excuse to keep me busy inside, as it´s pouring down outside, and to treat myself with something sweet…  After all it´s suppose to be my summer holiday, and with this weather and temperature I thought I deserved a day on the sofa, accompanied by baked goods, coffee and a good book. So I stayed inside making raspberry marmalade and went on baking Hindbærsnitter. Luckily, they came toghether quickly and without much effort, so the rest of the day could be spent relaxing enjoying the results…

Like I remembered, they were lovely. Really sweet both by their look and taste. I might have gone a little overboard with the frosting, but who cares. Days like these crave sugar…!

Hindbærsnitter

  • 250 g all purpose flour
  • 1 tsp baking powder
  • 250 g cold butter (chilled and cubed)
  • 250 g sugar
  • 1 egg
  • + about 300 g raspberry jam

Frosting

  • 400 g confectioners sugar
  • + water or lemon juice

Method

Preheat oven to 200 degrees C and line two baking sheets with parchment paper.

Make the dough: Stir together the flour, sugar, and salt. Work in the butter with your fingers, pastry blender or food processor until pea-sized lumps of butter are still visible, and the mixture holds together when you squeeze it. If you’ve used a food processor, transfer the mixture to a large bowl and add the egg. Mix just until everything is cohesive, kneading briefly on a well-floured counter if necessary.

Refrigerate for 3o minutes.

Make the tarts: Divide the dough in half, and place on a lightly floured work surface.  Roll the crusts with a rolling-pin into a size of 12×25 cm and  3-4 mm thickness.

Bake in a preheated oven until the edges are lightly golden brown, about 10 minutes. (Be sure to keep an eye on them, time depends on how thin you roll them) Allow to cool on the baking sheets.

Meanwhile, stir together the confectioners’ sugar and water/lemon juice and make a spreadable frosting. It should be quite thick. Spread one of the cooled tarts with frosting and sprinkles. (I used freezedried berries) Spread raspberry jam out on the other pastry.  Sandwich them together, the frosted pastry on top of the raspberry spread. Press them a little together if you manage, and cut into (in)appropriate sizes.

Serve once the frosting is completely set or not, if you can’t wait (like me) and like it a little soft and sticky. Now all you need is a blanket and a cup of hot beverage, and something to read, and the summer-rain can just keep coming…cause I´ve got hindbærsnitter, the perfect accompaniement on a rainy day!

IMG_0535

Rhubarb muffins

IMG_9513

Rhubarb season is finally upon us! My favorite season? At least one of my favorite vegetables! Yes – it´s a vegetable!!!

When rhubarb arrives and you see various recipes for rhubarb crumble, lemonade and muffins – it´s a sure sign of spring and a promise of summer. I might try out a new recipe each year, but I usually fall back to crumbles and this old classic: My mother´s rhubarb muffin. Mum knows what she´s doing already, so no need to change or tweak this. It´s simply perfect.

So when I visited my parents yesterday, I made a request for some rhubarb, and in my defense the saying says to pick it within midsummer which is only a few days away….So I took home a large bunch to do some baking. When my father saw me and the rhubarb he suggested the muffins. He loooves them. So do I. Actually, everyone does. So the idea was planted in my head: What better way to start rhubarb-baking-season than with a real family classic!

So, today, equitted with rhubarb, eggs, butter and apron I realized: The recipe is in my recipe book which currently is located in copenhagen! And my mother is out of town!!! What to do? Well, luckily, it´s not the only rhubarb-muffins-recipe on the planet (one of the best, perhaps) so I turned to google as I often do and found what seemed like a good replacement!

And indeed it was! Actually, in a way this is a more extravagant version of the usual…

Maybe a little less gooey, but my go-to-recipe is so gooey you need a spoon, so that´s maybe a little overexaggerated for some! 😉 Anyway – both equally delicious!

I hereby declare rhubarb-season for opened!

IMG_9534

Rhubarb muffins

Rhubarb compote/ Rabarberkompot
10 oz rhubarb / 300 g rabarbra
1/2 vanillabean/ ½ vaniljestang
2.5 oz sugar / 70 g sukker

Clean and cut the rhubarb in inch-sized chunks. Pour rhubarb, sugar and vanillaseads and bean in a pan and stir. Cook on medium heat until everything is soft and compote-looking.

Rens rabarbraen og skjær dem i skiver på 2-3 cm
Ha rabarbra, sukker, vaniljekorn og den halve tomme vaniljestang i en gryte – og rør det sammen. La rabarbraen simre ved middelvarme til de er møre og minner om en grov pure.

Muffins

3 eggs / 3 egg
6.5 oz sugar / 180 g sukker
8 oz flour / 220 g mel
2 tsp vanilla sugar / 2 tsk. vaniljesukker
1.5 tsp baking powder / 1,5 tsk. bakepulver
5 oz butter (melted) 150 g smør (smeltet)
4.5 oz marcipan finally chopped / 120 g revet marsipan

Whisk egg and sugar until creamy. Stir in the dry ingredients and the melted and cooled butter. Finally fold in the chopped marzipan. Divide the batter in muffin cups, and top with a spoonful of the rhubarb compote. If desired, sprinkle with crumble!  Bake for 20-25 minutes at 350 F.

Pisk egg og sukker til en luftig masse.
Rør alle de tørre ingredienser i og det afkjølede smør.
Vend til sist revet marsipan i muffindejen.
Fordel deigen i muffinsformer. Top med rabarbrakompott og drys en teskje crumble over.
Bag ved 180 grader i 20-25 min.

IMG_9520


My first bread pudding!

IMG_8070

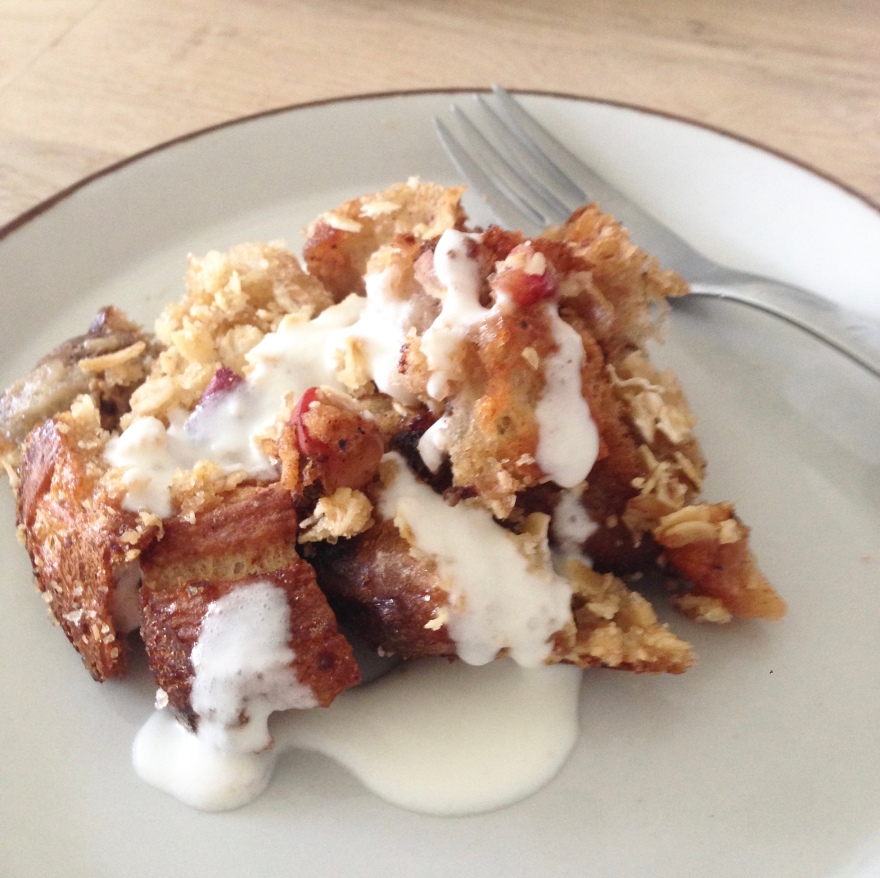
It feels kind of wrong posting this now, on such a sunny spring day when I usually eat light summer food. The smell of cinnamon and baked apples, suddenly put me in an Christmas mood and (almost) longing for autumn! But there´s still a crispness to the air, which means that mornings and evenings are still cold, and best enjoyed with a sweet breakfast or dessert. Enter Bread Pudding!

Bread pudding is something that I´ve stumbled upon several times among my many English/American cookbooks, and certainly it´s been mentioned by Jamie and Nigella more than once when talking about comfort food. And I´ve seen pictures of this dessert-thing over and over, over the years. It always seemed intriguing to me, tempting in a comforting way, but not tempting in the way like chocolate, ice-cream, cheesecake or other desserts can do, so although I understood the concept and idea of this dessert, it never made it to the dessert table in my house, because of strong competition (and a chocoholic boyfriend). It wasn´t until a couple of years ago I finally actually got to try bread pudding, when me and boyfriend were eating out, and the menu was set, so no choices for us and no possibility to not choose bread pudding, if that should have appeared on the dessert menu. Luckily for us, it did, as bread pudding was the dessert on the menu that day and was served to us! Any other way, we would have missed out… We shared a mini loaf of bread pudding, and OMG, it was so extremely good! We scraped the bowl to get everything of the good stuff, and agreed it was the best thing on the menu that evening. Later, I got to thinking of baking this for myself and make my own version. Somehow, years went by, with no bread pudding being made. But a couple of days ago, a picture of bread pudding from my pie-book caught my eye. And a few days earlier I bought a sour dough bread which turned out to have ONE gigantic hole instead of the usually many few, making it difficult to use for spreads or fillings. So, what to do…? I don´t throw food, I get creative!

Croutons? Nah – boring. Plus, I don´t plan on having a salad where it could be used for the next days. French toast? Nah, that wouldn´t look good with that hole. But maybe something french-toast-like, like…. Bread Pudding! Yaaay! That´s what I´m making!

I´m glad I realized that this was an overnight project, because it´s oh so disappointing when your mind (sweet tooth) is set on something, and you don´t get it because “it needs time”. Since this was my first time doing this, i certaintly needed a recipe as a starting point. But since the recipe said 12-15 servings, and I´m only one (one person – though I definetely can take more than one serving…) I needed to adjust the amounts, and adding apple and the topping, I made my own version, and a very good one! The only problem was that I only had a family-sized baking dish, resulting in a not so tall bread pudding. But who cares – It´s my first bread pudding, cut me some slack. And besides, low height with a large surface equals more crispy topping!

Bread Pudding

120 grams sour dough bread

1 egg

50 g sugar

1 dl full cream

1.5 dl milk

1 apple

Topping:

10 g butter

20 g sugar

20 g oats

(Any white bread can be used, but I felt sour dough was perfect as the acidity balances out the sweetness. But if you want to go all in, for more sweetness, feel free to use whatever: toast-bread, brioche or leftover croissants or cinnamon-rolls, if such things exist!)

Instructions

Spray a 20×30 cm (9×13 inch) baking dish with nonstick spray.

Cut or tear the bread in cubes or chunks, and line your dish with one layer of bread cubes.
Cut the apple, and put it in a pan along with cinnamon, water and half the amount of sugar. Stir over medium heat until thickened and bubbly. Cook for 2 minutes, constantly stirring. Remove from heat and spoon the filling onto the bread layer. It doesn’t have to be perfect, Just spread the apples about.Top the apple with another layer of bread and pack tightly.
In a separate bowl, whisk together the egg, cream and vanilla. Whisk until well combined.
Pour mixture over the bread. Cover with foil and let chill in the fridge for at least 8 hours or overnight.When ready to prepare, take bread out of the fridge and let rest on the counte.

Preheat oven to 150 C/ 350F.
Prepare the topping: Mix together butter, sugar, and oats. Spread over the top of the bread. Again, doesn’t have to be perfect.

Bake for 45-60 minutes, or until bread is fully toasted and eggs are set. Let cool for at least 1 hour. Serve warm or at room temperature, with cream, yoghurt or  ice cream if so inclined. Enjoy!

IMG_8074


Banana-coconut bread

I love banana bread.

IMG_6359

For various reasons:
1: Bananas
2: It´s called bread, but it´s actually a cake in disguise.
3: You can play around with it and add whatever, and it usually works!

Which means, to sum it up: you can make it as bread-like, or cake-like as you want, use different kinds of flour, wheat, spelt – whole grain or not, adding nuts chocolate or other things, even make it sugar free – and the banana bread can handle it!

IMG_6361

Banana bread is therefore very forgiving to work with, which is perfect for me as I have a hard time following a recipe to the point. I usually end up adapting it, intentionally or not, usually because I don´t have the exact ingredients on hand, and I´m too lazy to go out get it once my mind is set on baking.

This time however, I planned on following the recipe, as I found the pictures and description of the cake very intriguing. As all other recipes on this blog. Check it out! What made this different from other banana breads, was the caramelization of the bananas. Anything caramelized is just… better!
So that would be unchanged, that was for sure.
But somehow I ended up making my own version of the recipe, as I had some almond flour I wanted to use. And I usually try to make cakes more whole grain when I can, as I know I will be the one eating it sooner or later, the same thing about sugar: I often reduce the amount (so I can eat more 😉 and besides, for banana cake, a lot of sugar is usually not needed as the bananas themselves add alot of sweetnesss. Especially if you use brown bananas. The browner – the sweeter – the better!

I had a good amount of frozen brown bananas put aside for this cake, which finally could come togehter on a rainy sunday! I was a litte curious about the result, but even if the cake became somewhat diffrent then the original recipe, I thought it was delicious and a perfect afternoon treat! The banana-coconut flavour was a lovely combination even without the chocolate! I´m sure added chocolate would be lovely too, but without, you could always add some nutella or other chocolate spread if you get the cravings!

I allowed myself a decent slice with butter on top, because there no such thing as butter on freshly baked goods. Next time, I can try chocolate. But the cake on it´s own is perfectly good too! And actually quite healthy, after I twisted the recipe a litte around! Enjoy, one way or another, I´m sure it´ll be delicious either way!

Roasted banana and coconut cake – my way!
(Adapted from this recipe)

Ingredients:
4-5 browned bananas
175 g flour/ 1 1/4 cups –
(I used about 75 g almound flour and all purpose/whole wheat flour)
50 grams/ 1/2 cup all-purpose flour
1 teaspoon baking soda
1/2 teaspoon salt
2 eggs
75 grams/ 1/3 cup loosely packed brown sugar
1 dl/ 1/3 cup canned coconut milk (may swap butter milk or greek yogurt)
1/2 cup coconut oil, melted (or swap canola oil – which I did)
1 teaspoon vanilla extract
50 grams / 1/2 cup toasted coconut flakes (optional)
2 tablespoons unsweetened coconut flakes (optional)

Instructions

Preheat oven to 200 C or 400 degrees F.
Line a baking sheet with parchment paper or a silpat. Peel the bananas and lay them flat on the baking sheet, and sprinkle with sugar. Roast them for 20-25 minutes or until the tops of the bananas are very golden brown and caramelized. Remove from the oven and let cool 5 minutes. Once cool enough to handle, mash the bananas and set aside. Reduce the oven temp to 175 C / 350 degrees F.
Spray a 9×5 loaf pan thoroughly with nonstick spray.

In a small bowl, combine the different flours, baking soda and salt, whisking thoroughly. Set aside.In a large bowl, whisk together eggs and brown sugar until smooth. Add in coconut milk and canola oil, whisking until combined. Stir in mashed bananas and vanilla until mixed. Slowly stir in dry ingredients and mix until just combined. Fold in the toasted coconut. Pour batter into the greased loaf pan and sprinkle with the remaining unsweetened coconut flakes.

Place loaf pan on a baking sheet and set in the oven. Bake for 50-60 minutes, or until center is set. If the top begins to brown, tent the bread with aluminum foil. Remove and let cool for at least 30 minutes before cutting. Bread will keep (covered) for 3-5 days.

IMG_6360

Whole wheat blueberry rolls

IMG_5055

Long time no blogging. I know. Seriously a long time. And I can´t really blame life of getting in the way or something like that, as I´m ending my 2-months long summer holiday with no job, no – or very little studying and not really any good summer-weather either, “forcing” me outside… So there should have been plenty of opportunities to bake, cook and blog, but too much time makes me lazy… What can I say? The less I do, the less I….do. But now I´m back! Because I´ve really actually cooked and baked and eaten a lot of good food this summer, so I guess I ought to share some of it, and not keep it all to myself!

The last weeks, when there was several days in a row without rain (yeah, I know) I packed my blueberry-picker and went hunting. (Appearantly the picker is a somewhat Norwegian, or maybe scandinavian? thing, because it really attracts tourists!) I´ve had heard that the blueberry season was started, and some friends had already been having good luck finding berries, so I was pretty optimistic. But I have to say I was a little disappointed. There weren´t as many as previous years, and besides, they were small, but I thought to myself that a cold summer with a slow ripening process would produce even better berries, as the case is for strawberries. It wasn´t until some old ladies came along and spotted me and my picker in the woods, who also noticed the small size of the berries and claimed that they weren´t sweet, that I actually took a berry-tasting-test. I thought they might have said it to scare me off and have the berries to themselves, but they were right. The blueberries weren´t really sweet. Bummer. But I finished the surrounding blueberry bushes and started to walk home. On my way I came to talk with another guy curious about the berry situation, who asked about ripeness, size and flavour. When I said that they were pretty small and also a little sour, he said “Well, then it´s almost a complete waste of time!” And I wondered, was it? Did I spend so many hours for nothing? I would prove him wrong! These blueberries maybe aren´t the best for snacking, but put into baked goods in companionship with sugar and butter, that would probably make up for it! I made some jam right away, which was lovely, but now, it´s time to do some baking, I figured! Today I invited a friend over for coffee and something home-baked, so I figured it was a nice opportunity to use some of the berries. I finally made a decision on what to bake (my first intention was a blueberry bundt cake, eventually a pie – but as there was just the two of us, I figured it would be better with something in a serving size that also could be frozen) and landed on these blueberry rolls.

I was a little short of time, so I tweaked my single-rising yeast recipe, and adapted it to a more suitable number of rolls. I substituted most of the wheat with whole wheat, and used fresh blueberries, butter, sugar and marcipan for the filling. They turned out delicious! A little burned, but still good!

Whole wheat blueberry rolls

  • Prep time: 1 hour and 30 minutes (or more if you have the time)
  • Cooking time: 15 minutes
  • Total time: 2 hours

Ingredients – makes 12 rolls

  • 2 dl milk
  • 100 g butter
  • 100 g powered sugar (which I replaced with regular sugar)
  • 30 g fresh yeast
  • 1/2 tsp cardamom powder
  • 500 g flour (I used about 3/4 whole wheat, and 1/4 regular wheat)
  • 2 dl blueberries
  • 50 g sugar
  • 50 g butter
  • 50 g marcipan

Instructions:

Bring milk, sugar and butter to a boil in a large pan. Remove from heat and allow to cool until it reaches a lukewarm temperature. You can speed up the cooling-down process by putting the pan in the zink filled with cold water. Add the yeast into the mixture, and stir in cardamom and the flour. (If the pan isn´t big enough, simply pour the milk-mixture into another bowl, and then add the flour) Knead the dough into an elastic large ball, using your hands dusted lightly with flour. (If you have them time, put the dough in a covered bowl, and let rise in a warm place about 1 hour or until the dough has doubled in size – but the original recipe actually skips this point!)

Preheat oven to 200 degrees Celcius. Roll the risen/or unrisen dough out on a lightly floured surface, until it is approx 30×40 cm long and 1/2 cm thick. (The thinner you get it, the more area you have for filling, so that might have to be adjusted up or down accordingly if you roll it thicker or thinner)
To make filling, combine all ingredients in a bowl, mashing the berries slightly.
Spread the filling evenly over the surface of the dough.

(Whereever you go from here, is entirely up to you, whether you want to roll them like a cinnamon roll, or make them something like mine. I won´t say how I my rolls got their look, cause I did it wrong (again) and it turned out quite messy… If you´re like me, and cannot figure out the twisting, here´s an instruction video: How to twist a cinnamon-roll, or else, here´s how it goes)

Now fold a third of the dough towards the middle, and fold the other third over the first one, so you have 3 layers of dough. Cut the dough into 12-15 strips about 2 cm wide. Twist each strip until the dough stretches 20 cm long. Twist it around to shape it into a snail shell (roll) tugging the end of the dough under the roll Place the buns on a baking sheet covered with baking paper, with the twists facing upwards. Cover and let them rise to reach the double size for approximately 1 hour. Sprinkle the buns with sugar and chopped almonds. Bake them on 200 C for about 12-14 minutes or till they turn golden. Cool on a rack, or enjoy immediately, when they´re still warm and the filling is gooey…

Perfect to break apart and eat it bit by bit, making room for a zip of black coffee in between the bites! I love to eat them like that, getting a feeling of all the different textures and flavors. And the berries were perfect in these rolls! The buns turned out sweet and buttery, hearthy and filling because of the whole wheat, and the marcipan gave a lovely almondy flavour! I knew the berry picking wasn´t a waste!

Super moist bananabread with pecans!

IMG_0429

First things first: Is it banana bread? Or is it banana cake? To me, it´s cake. I mean, when I can choose between cake and bread – well, the answer it pretty much given… And another thing, why would one call it bread, by any means? It contains lots of sugar, butter, fruits and no yeast – unlike any bread. But you do, usually, bake it in a bread-like-pan…. So I guess that´s why it´s got it´s bread-name. Anyway, who cares, as long as it tastes like cake! And when you can present it as bread, though in reality it is a cake, everyone´s concience is clean: The baker´s and the eater´s. (Or mine, as it would be called in my case…)

I had some very overripe bananas lying around – and so starts every story of a banana bread. (cake)
Actually, I had kind of let them overripe on purpose, so I could have an excuse to bake with them! But only partly…My mother bought all kinds of food, and pretty much filled my fridge and freezer before she left, so it was inevitable that something would – not go to waste – but, end up in baked goods. Maybe that was her plan all along. Ahh, she knows me too well!

So, Sunday came, the bananas were brown as ever, and I had cake-cravings! Off to the bookshelf to find a nice recipe. I do have a couple of winner banana-bread recipes, that are just amazingly good, but I´m kind of in this getting-to-use-my-cookbooks-flow for the moment, so I grabbed three candidates and started the search. I almost turned to Dorie, again, but then it would be a bundt, and not a loaf. I wanted a loaf. And I feel with her, I shouldn´t change the recipe too much, I have a feeling it´s best to leave it to her. And I wanted to use some yoghurt and nuts, cause that´s good stuff in a banana bread. So, finally, I picked the banana pecan bread, from Leila Lindholm´s Piece of Cake. The picture of that bread was one of the first things that got stuck on my mind from that book, along came many other things… And one of the reasons I got the book! Besides, it´s so pretty! But, I haven´t really baked anything from it yet besides a bread, so it was about time I started the serious business – on to the cakes!

I adapted the recipe slightly, substituting some of the butter with yoghurt, powdered sugar with sugar, and some of the flour with whole wheat, but the original recipe goes like this. And I only had 3 bananas… But I don´t have the measurements I used, so I present to you the original recipe!

Pecan-banana bread

150 g butter
1 dl sugar
2 dl powdered sugar
4 ripe bananas
2 eggs
3 dl flour
1 ts baking powder
pinch of salt
75 g pecan nuts

Stir the sugars and butter light and creamy.
Mash the bananas (keeping a few chunks if you like – I know I do!) and stir them into the batter. Add the eggs. Mix the dry ingredients and pecans, and gently fold them into the batter. Pour into a buttered loaf-pan, and bake the cake for about 30 minutes in the center of the oven. (Mine needed longer) A toothpick inserted in the center of the cake should come out clean. Allow to slightly cool, and dig in!

This cake can be served pretty much any way you like: Warm or cold, with our without butter, nutella, ice cream….you get the picture. I thought it was really good straight from the oven, warm and nice, so that the butter I added just melted into the cake. But on the other hand, it´s also really good the second, or third day, when it has had time to set – then you really get the moistness of this cake… Yummy either way!

IMG_0442

World peace cookies

IMG_2881IMG_2879IMG_2878

If you´re well known in the cookie buisness, you might have heard of these. If not, let me introduce you. These cookies come from Dorie Greenspan´s “Baking – from my home to yours”. When I finally got my hands on this book, I was kind of overwhelmed. First of all by its size and weight (it was a gift) – it was enormous! And secondly, and maybe most importantly, by the number of recipes. (I guess I should have predicted that, given its size, but – well, what can I say…) The book doesn´t waste a lot of space or pages on pictures – which I normally don´t think is a waste – on the contrary, it´s what makes me want a cookbook, and what makes me purchase it. But here, I´m thankful the pictures are left out to make room for more recipes. After all, it was a struggle to get that book, as you can read here

But, when I was going to start baking, I had no idea where to start. I mean, where does one start with over 300 recipes? And almost without any pictures to tempt me? Hmm. One starts at google, of course! I searched for “best, or favourite recipes”, and after a little googling, there were a few recipes that seemed more popular than others. One of them were something called world peace cookies. (Another was Swedish visiting cake, so that´s next on my list!) A cocoa-cookie with sea salt and chocolate chunks. Well, that didn´t exactly put me off! Though, normally I like my cookies non-chocolate. That is, without cocoa in the batter. But not completely without chocolate! Hell no! Bring on the chocolate chunks! But, I decided to have an open mind. So many people can´t be wrong. And it´s not like I dislike chocolate cookies, they´re just not my favourite. Until now.

IMG_2894

I made these for the first time a while ago, but they turned out butt ugly, delicious though, but not to be broadcast worldwide. Sorry guys, I´m shallow. These turned out better. And I know what you´re thinking: They´re not that good looking. And seriously, can they be that good? Isn´t it just another cookie?
No – it´s not. It´s a cookie, yes, but it´s a really, really good one.

The taste is rich and very chocolatey. It´s enhanced by the addition of sea salt. Oh chocolate and sea salt. How I love you two together. And my photos don´t really do them any justice, and that´s not just because of my lack of photo-skills, it´s because any photos of these cookies can´t show how yummy-tasty they are! Appearantly these cookies got their name, by Dorie’s neighbour who thought that a daily dose of these cookies would be enough to instigate world peace. Well, I don´t know about that. I see his point, but on the other hand, these cookies might as well start a world war. You get the point: They´re good.

World Peace cookies

1 1/4 cups (175 grams) all-purpose flour
1/3 cup (30 grams) unsweetened cocoa powder
1/2 teaspoon baking soda
1 stick plus 3 tablespoons (11 tablespoons or 150 grams) unsalted butter, at room temperature
2/3 cup (120 grams) (packed) light brown sugar
1/4 cup (50 grams) sugar
1/2 teaspoon fleur de sel or 1/4 teaspoon fine sea salt
1 teaspoon vanilla extract
5 ounces (150 grams) bittersweet chocolate, chopped into chips, or a generous 3/4 cup store-bought mini chocolate chipsWhisk flour, cocoa powder, and baking soda into medium bowl.

Using electric mixer, beat butter in large bowl until smooth and creamy. Add both sugars, vanilla, and sea salt; beat until fluffy, about 2 minutes. Add flour mixture; beat gently just until blended (mixture may be crumbly). Add chopped chocolate; mix just to distribute (if dough doesn’t come together, knead lightly in bowl to form ball). Divide dough in half. Place each half on a sheet of plastic wrap or parchment. Form each piece into 1 1/2-inch-diameter log. Wrap each tightly and chill until firm, about 3 hours. (Note: this can be done in advance – logs can be stored in the fridge up to three days before slicing and baking).

IMG_2886

Preheat oven to 325°F. Line baking sheets with parchment paper. Using a sharp knife, cut logs crosswise into 1/2-inch-thick rounds. Space cookies 1 inch apart on prepared sheets. Bake 1 sheet at a time until cookies appear dry (cookies will not be firm or golden at edges), exactly 12 minutes. Transfer to rack and cool before enjoying with a large glass of milk.

Makes 20-22 cookies.

IMG_2884

IMG_2892

Brownies with walnuts and browned butter

_MG_0427

I´m home on holiday – again! I know!!! That´s the advantage of having my exam after Christmas – getting an extra vacation! So, that´s pretty nice… I came home last weekend to Celebrate my boyfriend´s mother´s birthday, cause she was turning 60, and having a big celebration. And the plan was to fly back on Sunday for my exam the following monday. But, it turned out, that after my exam there weren´t any lectures until February! And as the exam was a home-exam, well, why not stay at home in Norway writing it? After all, that is my primary home! So I did! And now I have a good week at home to do – well – bake? It´s not like I have anything else scheduled! Well, other than seeing family and friends, of course. But those things are very well combined. Last night, I had a friend over while my boyfriend was at football practice. Our initial plan was meeting at a café and then going to the cinema, but poor as we are, we decided on a night at home instead.

I promised her some baked goods, and had my mind on brownies. She´s pretty much a chocoholic (yeah – blame her…) and, well, ok, I was having massive chocolate cravings, so brownies seemed just right. And easy enough to gobble on when you´re deep down in the sofa, under the blanket, watching tv. Important. So, the one thing I was going to do that day, was baking a batch of brownies before her arrival. But did I manage? Nooo. I spent too much time gazing out the window. Facebooking. Warming my hands above the oven. Staring out the window again. And searching for recipes – brownie recipes. I had borrowed the Hummingbird bakery cookbook from my mother, and was planning to make the basic brownie recipe from that book. But then I had some extra time on my hands, and starting searching online for recipes…

_MG_0423

_MG_0420

And then I found these. They looked insanenly good. I was a little surprised to see that the brownies were made of cocoa, not chocolate, I mean, being a brownie, and all! And still – they looked so chocolatey! But, than again, I do recall a super-moist chocolate cake made from cocoa, so that didn´t put me off! I was a little afraid that the basic Hummingbird brownies weren´t gooey enough, or fudgy enough to my like, cause I couldn´t really judge by the photos. And to me, that´s what brownies are all about. Fudge and goo – yes please! I realized that the ingredients and measures in the cocoa brownies were the same as another Hummingbird-recipe, the frosted one, though without the frosting… So, I decided on that one, and got to use the book after all! I just tweaked the methods, to go with Alice Medrich´s approach. And also with her addition of browned butter…..mmm.

So, I never managed to bake the brownies before my friend arrived. But what´s good, is that these brownies come together in no time! Cause we were gonna have brownies, that was for sure! I just whipped them together in a hurry after dinner, and within an hour, they were served! And maybe it was just as good I didn´t bake them in advance, because what´s better than warm, fudgy brownies, straight from the oven?It was the perfect accompaniement to Bridesmades, a glass of milk and good company!

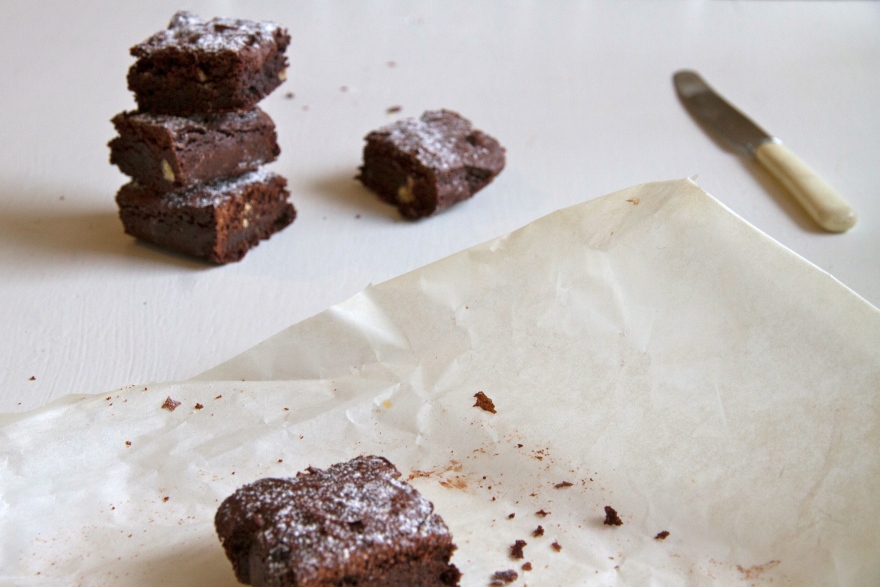
Verdict: Fudgy? Check! Chocolatey enough? Check! Good? Hell yeah!
So yes, the brownies lived up to their expectation, and to the photos – Luckily!

Bake away!

brownie

Cocoa Brownies
(Adapted from Alice Medrich)

Makes 16 larger or 25 smaller brownies

10 tablespoons (140 grams) unsalted butter
1 1/4 cups (250 grams) sugar
3/4 cup plus 2 tablespoons (65 grams, though some brands may weigh more) unsweetened cocoa powder
1/4 teaspoon salt (or a heaping 1/4 teaspoon flaky salt, as I used)
2 large eggs, cold
1/2 cup (65 grams) all-purpose flour
2/3 cup (75 grams) walnut or pecan pieces (optional)

Position a rack in the lower third of the oven and preheat the oven to 170°/ 325°F. Line the bottom and all 4 sides of an 8-inch square baking pan with foil and coat with nonstick vegetable spray

Melt the butter in a medium saucepan and continue to cook, whisking gently, until it is golden brown and the milk particles suspended in it are reddish brown. Remove the pan from the heat and stop the cooking by immediately adding the sugar, cocoa powder and salt. Stir to blend. Let cool for 5 minutes; the mixture will still be fairly hot. (Well, I didn´t have time for that – instant chocolate cravings! And they still turned out beautifully!)

Add the eggs one at a time, beating vigorously with a wooden spoon or a silicone spatula after adding each one. When the mixture looks thick, shiny, and well blended, add all of the flour and stir until you no longer see streaks of flour, then beat vigorously for 50 to 60 strokes with the wooden spoon or the spatula. Stir in the nuts.

Spread the batter in the lined pan, swirling the surface if you like. Bake for 20 to 25 minutes, until a toothpick inserted into the center emerges almost clean (the brownies will still be soft and gooey even if the toothpick looks clean). Cool in the pan on a rack.

Lift the edges of the foil liner and transfer the brownies to a cutting board. Slide a metal spatula under the brownies to detach them from the foil (or invert the brownies and peel off the foil, then turn the brownies right side up again). Cut into 16 or 25 squares. The brownies keep stored airtight, for 2 to 3 days.

_MG_0426